
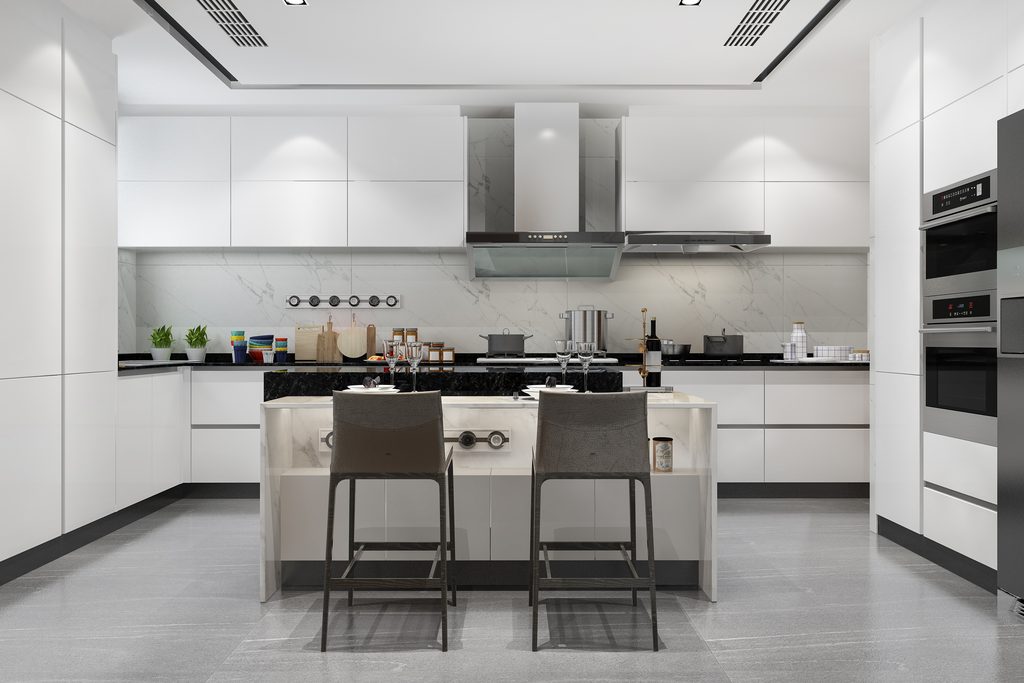
A kitchen is the hardest room in the house to renovate. It has water, fire, electricity, storage and daily cooking, all in one small space. One missed detail can delay the work or push up the cost.
That is why every smart homeowner starts with a kitchen renovation checklist. It turns a stressful project into a series of clear decisions.
At Ekratna Interiors & Constructions, we plan kitchens for homes across Pune. This guide shares the exact points we cover before the first tile is removed. Use it as your own working list.
Why You Need a Kitchen Renovation Checklist
Many people start a kitchen makeover with a Pinterest picture and a rough budget. That is a good start, but it is not a plan.
A proper kitchen renovation checklist helps you in four ways:
- It keeps your budget under control.
- It stops last-minute changes that cost extra.
- It helps you compare quotes fairly.
- It shortens the time your kitchen stays out of use.
Think of it as a map. Without it, you may reach the end but you will take many wrong turns.
Step 1: Define Why You Are Renovating
Start with the reason. Your goal decides every other choice on the list.
Ask yourself these questions:
- Is the kitchen too small or poorly laid out?
- Do you need more storage?
- Is the old plumbing or wiring unsafe?
- Are you updating the look before selling or renting?
- Do you cook more now than before?
Write down your top three goals. If a feature does not support them, it can wait.
Tip: Spend one week noting what annoys you in your current kitchen. Those notes are the best design brief you can give your designer.
Step 2: Set a Realistic Budget
Budget comes before design. Otherwise, you may fall in love with a plan you cannot afford.
Decide your total number first
Fix a maximum amount that includes materials, labour, appliances and taxes. Then add a buffer of 10 to 15 percent for surprises. Old walls and pipes often hide problems.
Know where the money usually goes
Every kitchen is different. Still, this table shows a common way to think about it:
| Item | Typical share of budget |
|---|---|
| Cabinets and storage | Largest share |
| Appliances and chimney | Second largest share |
| Countertop and backsplash | Moderate share |
| Flooring and wall tiles | Moderate share |
| Plumbing and electrical work | Smaller but essential |
| Lighting and accessories | Smallest share |
The exact split depends on your choices. Ask your designer for an itemised quote so you can see every rate.
For a wider view of budgeting, read our home renovation guide for Pune. It covers planning, budget and common mistakes in more detail.
Step 3: Inspect What You Already Have
Before you design anything new, study the old kitchen. This part of your kitchen renovation checklist protects you from costly surprises.
Check the walls and waterproofing
Look for damp patches, peeling paint or cracks. In Pune’s monsoon, moisture can seep in through weak spots. Fix leaks before new cabinets go in.
Check the plumbing
Note where the water inlet, drain and sink are. Moving them costs more than keeping them. Replace old pipes if they look rusted or leak often.
Check the electrical points
Count the sockets and switches. Most modern kitchens need many more than older ones. Make sure the wiring can handle your appliances.
Check the ventilation
Cooking creates heat, smoke and oil. A weak exhaust leaves a sticky film on everything. Note the window position and the chimney duct route.
Step 4: Choose the Right Kitchen Layout
Layout is the heart of any kitchen. A good layout saves steps and makes cooking pleasant.
Understand the work triangle
The work triangle connects the stove, sink and fridge. Keep the distances short but not cramped. This one idea improves comfort more than most expensive upgrades.
Match the layout to your space
- Straight kitchen: works for narrow, small spaces.
- L-shaped kitchen: suits most apartments and uses corners well.
- Parallel kitchen: gives two working sides and plenty of storage.
- U-shaped kitchen: offers the most counter space in larger rooms.
- Island kitchen: needs a spacious, open area.
Browse our blog for detailed guides on each kitchen layout and which homes they suit best.
Step 5: Plan Cabinets and Storage
Storage is where a kitchen renovation checklist pays off the most. A clutter-free counter makes a kitchen feel bigger and cleaner.
List what you actually store
Count your pots, pans, spices, appliances and groceries. Design storage around these real items, not around a catalogue picture.
Use smart fittings
- Pull-out trays for easy reach.
- Corner carousels for dead corners.
- Tall units for dry grains and packets.
- Deep drawers for heavy pots.
- Tandem baskets for plates and bowls.
Pick durable materials
Kitchens face heat, steam and splashes. Use moisture-resistant plywood for the base units. You can compare plywood grades through the standards listed by the Bureau of Indian Standards.
Good hardware matters too. Soft-close hinges and strong channels will keep working for many years.
Step 6: Select the Countertop and Backsplash
The countertop takes the most daily wear. Choose it with care.
Compare common countertop options
| Material | Strength | Watch out for |
|---|---|---|
| Granite | Heat and scratch resistant | Needs sealing; heavy |
| Quartz | Non-porous and low maintenance | Can be affected by very high heat |
| Stainless steel | Hygienic and durable | Shows scratches over time |
| Laminate | Budget friendly | Less heat resistant |
Don’t forget the backsplash
The wall behind the stove and sink gets the most oil and water. Use glazed tiles or glass panels. They wipe clean in seconds.
Step 7: Decide on Flooring
Kitchen floors must be non-slip, easy to clean and strong. Water and oil spill often.
- Choose matte or anti-skid vitrified tiles.
- Avoid very glossy tiles near the sink.
- Pick a colour that hides small stains.
- Keep grout lines narrow, as wide lines trap dirt.
If your floor is in good condition, you may only need deep cleaning or re-grouting. That can save a large part of your budget.
Step 8: Choose Appliances Early
This point on your kitchen renovation checklist is often missed. Appliance sizes decide the cabinet sizes. So choose them before the carpentry starts.
Make a list of appliances
- Hob or cooktop
- Chimney or exhaust
- Refrigerator
- Microwave or oven
- Dishwasher, if needed
- Water purifier
- Mixer grinder and other small appliances
Check energy ratings
Look for star-rated appliances to cut your electricity bill. The Bureau of Energy Efficiency explains how the star label programme works.
Size your chimney properly
A chimney that is too small will not clear smoke. Match its suction power to your cooking style. Indian cooking with heavy frying needs a stronger unit.
Step 9: Plan Electrical Points and Lighting
Add the sockets while the walls are open. Doing it later is messy and costly.
Plan the sockets
- Separate points for the fridge, microwave and chimney.
- Several sockets above the countertop for small appliances.
- A heavy-duty point for the dishwasher or oven.
- Switches placed within easy reach.
Layer the lighting
Use bright ceiling lights for general cooking. Add under-cabinet strip lights for the counter. This removes shadows when you chop or cook.
Safety note: Always use a licensed electrician for kitchen wiring. Poor work here is a fire risk.
Step 10: Sort the Plumbing and Water Setup
Water makes or breaks a kitchen. Plan it carefully.
- Choose a sink size that fits your largest pan.
- Decide between single and double bowls.
- Plan hot and cold water lines if you need them.
- Keep a clear route for the drain pipe.
- Add a shut-off valve for easy repairs.
Test every connection before the cabinets close. A small leak behind a finished unit is a big headache.
Step 11: Understand the Renovation Timeline
Most full kitchen renovations follow a clear order. Skipping steps leads to rework.
| Stage | What happens |
|---|---|
| 1. Planning | Measurements, design, quote and approval |
| 2. Demolition | Old cabinets, tiles and fittings removed |
| 3. Civil work | Plumbing, wiring, waterproofing, wall repairs |
| 4. Tiling and flooring | Wall tiles, floor tiles and countertop base |
| 5. Carpentry | Cabinets and shutters installed |
| 6. Countertop and fittings | Stone or quartz top, sink, hob and chimney |
| 7. Finishing | Lighting, cleaning, final checks and handover |
A full kitchen often takes several weeks. The exact time depends on your scope, material availability and approvals from your society. Ask your contractor for a written schedule.
Step 12: Plan Life Without Your Kitchen
This is the part nobody likes to think about. Yet it matters.
- Set up a temporary cooking corner with an induction plate and a kettle.
- Pack and store utensils you will not use.
- Plan simple meals or order in during the heavy work.
- Protect other rooms from dust with plastic sheets.
- Keep children and pets away from the work area.
A little planning here keeps the whole family calm during the work.
Kitchen Renovation Checklist for Small Pune Kitchens
Many Pune flats have compact kitchens. The same checklist applies, but a few points matter even more.
- Choose light colours so the room feels open.
- Go vertical with tall units and wall-mounted shelves.
- Use a single-bowl sink with a drainer to save counter space.
- Pick slim, built-in appliances where possible.
- Keep the counter clear by storing small appliances in closed units.
In a small space, every centimetre counts. Measure twice and order once.
Common Mistakes a Kitchen Renovation Checklist Helps You Avoid
Here are the errors we see most often in Pune homes:
- Ordering cabinets before choosing appliances.
- Ignoring waterproofing in the monsoon season.
- Choosing glossy floors that turn slippery.
- Putting too few power points.
- Skipping a written agreement with the contractor.
- Spending the whole budget on looks and none on hardware.
- Forgetting a buffer for hidden repairs.
Our guide on how to plan your home interior before starting explains how to avoid similar mistakes in the rest of your home.
How to Choose the Right Team for Your Kitchen
The right team matters as much as the right design. Check these points before you sign:
- Portfolio: ask to see finished kitchens, not only 3D images. You can view our work on the projects page.
- Itemised quote: every material, size and rate should be listed.
- Payment stages: pay in steps linked to the work done.
- Warranty: ask for a written warranty on workmanship and hardware.
- Site supervision: confirm who will visit the site daily.
You can learn more about our approach on the About Us page. Our full list of interior design services includes complete kitchen planning and execution.
Your Quick Kitchen Renovation Checklist
Here is the short version you can save on your phone:
- Write down your top three renovation goals.
- Fix a total budget with a 10 to 15 percent buffer.
- Inspect walls, plumbing, wiring and ventilation.
- Pick a layout that suits your space and your cooking.
- List everything you store and plan cabinets around it.
- Choose the countertop, backsplash and flooring.
- Finalise appliances before carpentry begins.
- Plan sockets, lighting and plumbing points.
- Get an itemised quote and a written timeline.
- Arrange a temporary kitchen for the work period.
Work through this kitchen renovation checklist one step at a time. You will feel in control throughout the project. For daily ideas and finished-home photos, follow us on Instagram.
Ready to Plan Your Kitchen Renovation?
Talk to the team at Ekratna Interiors & Constructions. We will walk you through every step of your kitchen renovation checklist and build a kitchen you will love using.
Book a Free ConsultationFrequently Asked Questions
What should be on a kitchen renovation checklist?
A good kitchen renovation checklist covers your goals, budget, inspection of old plumbing and wiring, layout, cabinets, countertop, flooring, appliances, lighting, timeline and contractor details.
How long does a kitchen renovation take?
A full kitchen renovation usually takes several weeks. The time depends on the size of the work, material availability and any permissions needed from your society.
How much should I keep as a buffer?
Set aside 10 to 15 percent of your total budget. Hidden problems in old walls, pipes and wiring often appear only after demolition.
Should I choose appliances before cabinets?
Yes. Appliance sizes decide the cabinet openings. Choosing them first avoids costly changes to the carpentry later.
Can I renovate only part of my kitchen?
Yes. You can replace shutters, change the countertop or add lighting without a full rebuild. A partial update suits kitchens where the layout and plumbing already work well.
Which materials suit Pune’s weather best?
Use moisture-resistant plywood, quality laminates or quartz tops, and anti-skid vitrified tiles. These handle the humidity of the monsoon and daily kitchen wear.